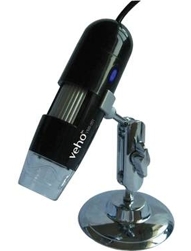
Microscope - USB digital
the Veho VMS-001
as used on a Linux PC,
with 'guvcview'
Microscope - USB digitalthe Veho VMS-001as used on a Linux PC,with 'guvcview' |
|
! Note !
Some information (and images and links) may be added,
if/when I re-visit this page.
Sections below:
INTRODUCTION (to the microscope)
Viewer-SOFTWARE (for Linux - 'guvcview')
SCRIPT (for running 'guvcview')
IMAGES (captured using 'guvcview')
|
Introduction : The Veho VMS-001 'USB microscope' is a low-cost (less than $60) microscope that can be plugged into a USB port on a personal computer to view small objects with a 20 to 200 factor of magnification. There are better microscopes that facilitate precise and non-frustrating focusing (frustration is discussed below), but they generally cost about $170 or more. The microscope has 8 built-in LED lights that provide good lighting of the object. There is a dial that can be used to adjust the amount of light shining on the object. You can capture still images in the JPEG image file format, and you can capture videos in the AVI video file format. (You can use software on your computer to convert the image and video files to other formats. There are many such conversion programs [free] available for the Linux operating system.) You can see some examples of static image captures in the IMAGES section below. The three main controls on the microscope (other than the double-jointed stand, used to adjust the distance from the microscope aperture to the object of interest) are
The snapshot button is rather useless because it moves the microscope when you try to take a picture. This is reported to result in fuzzy pictures. It is better to use the image-capture button of the software for your operating system to capture an image. You will need the brightness control dial and the knurled focus-knob, but they have the disadvantage of moving the microscope when you try to turn them. Neither of them is easy to turn. The knurled focusing-knob on mine is especially hard to turn, so if you have spent a lot of time positioning the microscope (with the double-jointed stand) and positioning your specimen (on a slide or jar lid or whatever), it is especially frustrating when you undo the positioning by trying to rotate the knurled knob to focus properly -- or by trying to rotate the brightness dial to change the lighting.
FEEDBACK to low-cost USB Microscope makers: Microscope documentation : A user manual for the Veho VMS-001 can be seen via this 25-page PDF file. In particular, note that the Veho manual says it supports Still capture resolutions of:
2560x2048 (5M interpolated), And the Veho manual says it supports the same Video capture resolutions. Unfortunately, many people report that they have only been able to achieve a max of 640x480 resolution. I have had the same experience (up to 2010 Aug 07) when using the 'guvcview' software on Linux (described below) to control image captures. If I find a combination of parameters that overcomes that limitation, I plan to report it on this web page. Here is a video showing a 2 minute demo of the microscope. Microscope software The Veho microscope comes with a small CD disc that holds the PDF manual and two installations of image capture software: one for MS Windows computers and one for Mac computers. The Veho manual spends most of its pages describing the use of the user interfaces of these two installations of the image capture software. Since I use the software on a Linux computer (using Ubuntu 9.10) and since there is no detailed description of how to use the microscope under Linux, I provide such a desription below, using the 'guvcview' program that is easily installed on Ubuntu Linux with a few mouse clicks --- via the 'Ubuntu Software Center' option. (Before buying the microscope, I found some postings on the internet where people announced that they were able to use the Veho VMS-001 USB microscope on their Linux machines. For example, the Veho VMS-001 is said to be usable under Linux at this reviews page at freelabs.com.) (By the way, I bought the microscope via phone order at J and R Inc. of New York City --- $60 in July 2010.) The image capture information is in the following categories, on this page :
Instead of using this menu of categories (sections) to go to a section and then scanning that section for information, you can use the 'Find text' option of your web browser to find phrases of interest, such as 'veho' or 'microscope' or 'image' or 'focus' or 'video' or 'audio panel' or 'guvcview' or 'script' or '/dev/' or '/bin/' or whatever. |
|
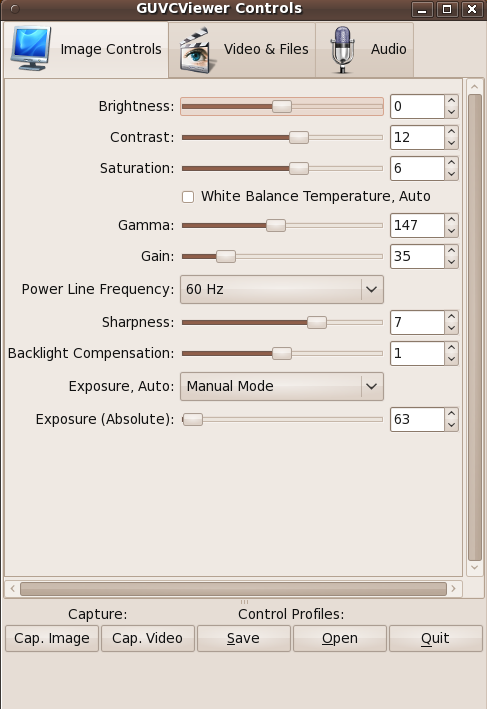
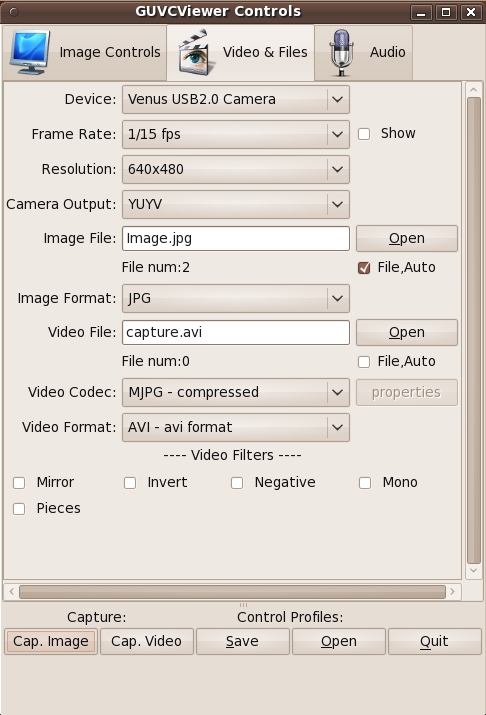
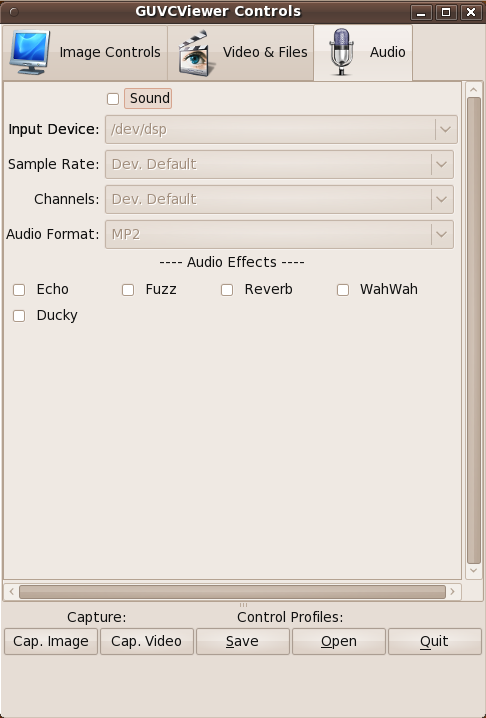
Viewer-SOFTWARE : ('guvcview' on Linux) Here are images of the three control panels of the 'guvcview' program for Linux: an image panel, a video panel, and an audio panel --- which are accessible in one window. In addition, there is a separate viewport window in which the still (or moving) image of the microscope subject can be seen.
Here is how I use the panels, to capture still images:
Launching 'guvcview' : To startup 'guvcview' so that it recognizes the USB microscope (instead of a web cam or other video device) --- and so that it is ready to take still images rather than video, I made a startup script called 'guvc.sh'. I will describe the script contents in another section below. You can simply highlight and paste that code into your own script file on your own Linux computer. When one has the script file ready, it is easy to make an icon on your desktop to launch the script --- which immediately brings up the 'guvcview' control panel window and the viewport window. The viewport window immediately shows the image that the microscope is capturing. (The following images, that show how to make the desktop icon, were captured on an Ubuntu 9.10 PC, using the Gnome desktop environment.) You simply right-click on the (Gnome) desktop and choose the 'Create Launcher ...' option from the popup menu. Here is an image of that popup menu.
When you choose 'Create Launcher...', you are presented with this Create Launcher panel, in which you enter a name for your icon and the fully-qualified name of the script file that you want to launch by double-clicking on the desktop icon.
Here is the help that you get for 'guvcview' by entering the command 'guvcview -h' at a command prompt in a terminal window on Linux: |
 $ guvcview -h

 guvcview 1.1.1

 Usage:
   guvcview [OPTION...] - local options

 Help Options:
   -?, --help                    Show help options
   --help-all                    Show all help options
   --help-gtk                    Show GTK+ Options

 GTK+ Options
   --class=CLASS                 Program class as used by the window manager
   --name=NAME                   Program name as used by the window manager
   --screen=SCREEN               X screen to use
   --sync                        Make X calls synchronous
   --gtk-module=MODULES          Load additional GTK+ modules
   --g-fatal-warnings            Make all warnings fatal

 Application Options:
   --version                     Prints version
   -v, --verbose                 Displays debug information
   -d, --device=VIDEO_DEVICE     Video Device to use [default: /dev/video0]
   -o, --control_only            Don't stream video (controls only)
   -g, --config=FILENAME         Configuration file
   -w, --hwd_acel=[1 | 0]        Hardware accelaration (enable(1) | disable(0))
   -f, --format=FORMAT           Pixel format(mjpg|jpeg|yuyv|yvyu|uyvy|yyuv|yu12|yv12|gbrg|grbg|bggr|rggb)
                                 [NOTE: Had to use 'jpg'. 'jpeg' is not accepted. Gives error.]
   -s, --size=WIDTHxHEIGHT       Frame size, default: 640x480
   -i, --image=FILENAME          Image File name [Defalt name = 'Image.jpg' or 'Image-N.jpg'
   -c, --cap_time=TIME           Image capture interval in seconds
   -m, --npics=NUMPIC            Number of Pictures to capture
   -n, --video=FILENAME          Video File name (capture from start)
   -t, --vid_time=TIME           Video capture time (in seconds)
   -p, --show_fps=[1 | 0]        Show FPS value (enable(1) | disable (0))
   -l, --profile=FILENAME        Load Profile at start
   --display=DISPLAY             X display to use
|
The 'man' help that you get by using the command 'man guvcview' is slightly different from the built-in help. For easy reference, I make that 'man-help' available in this 'man-help' text file. You can sometimes get additional insight into parameters used by a program by applying the Linux/Unix 'strings' command to the executable --- to see the human-readable strings in the executable. For easy reference, I make the output of the 'strings /usr/bin/guvcview' command available in this 'strings' text file. As a further note on the run-parameters of 'guvcview': I found that the 'guvcview' program saves its default run parameters (and changes that you make to them when you use the program) in 'rc' (run control) hidden files in your home directory. In fact, for a video device assigned to /dev/video0, 'guvcview' creates a '.guvcviewrc' file. And if there is a second video device assigned to /dev/video1, 'guvcview' creates a '.guvcviewrc-video1' file. In my case, the /dev/video0 device corresponded to a USB webcam -- a Logitech C500. And the /dev/video1 device corresponded to the Veho USB microscope. For easy reference, here is a sample image of a '.guvcviewrc-video1' file which corresponded to the Veho VMS-001 USB microscope. For completeness, here is a sample image of a '.guvcviewrc' file which corresponded to the Logitech C500 webcam. I see that, in the '.guvcviewrc-video1' file, there is a 'sound=' parameter that can be set to 0 or 1. There does not seem to be such a parameter option via the guvcview command line options. It would be handy to specify something like '-a 0' to indicate that no sound recording is wanted. The initialization messages coming from 'guvcview' indicate that it spends a little processing time, during startup, trying to determine if sound recording should be done. Here is a sample of 'guvcview' messages from when the program starts up. Note that there are four 'bt_audio_service_open: connect() failed: Connection refused (111)' messages at the beginning, indicating that the progam is trying to setup sound recording. I use several of the 'guvcview' command-line parameters --- notably '-d', '-s', '-m', and '-t' --- to formulate the 'guvcview' command within the launcher script. See the script in the next section. |
|
SCRIPT : (for running 'guvcview') Here is an image of the script that I am using to run 'guvcview' with suitable startup parameters. |
#!/bin/sh
##
## SCRIPT: guvc.sh
##
## PURPOSE: To run the 'guvcview' command with appropriate input values
##          to support manual captures of still images, NOT video display and capture.
##
## Started: 2010 aug 02
## Changed: 2010 aug 06 Changes in comments.

## FOR TESTING:
#   set -v
    set -x

##  We could add a zenity prompt (or 2 or 3) for parameters such
##  as image resolution. For example, to allow for 320x240 instead of 640x480.

## We startup guvcview in an xterm window (with a scroll bar)
## so that we can see its messages as we use the program.
## You can use the middle mouse button on the scroll bar to
## move the text up and down.
## Simply close the window when done.
## (It is held open due to the '-hold' option.)

xterm -sb -fg white -bg black -hold -e \
guvcview -d /dev/video1 -w 0 -m 0 -t 0 -s 640x480 -f yuyv

## DO NOT USE '-c 0' (capture interval in seconds).
## It freezes the viewport on the initial image.

## FOR TURNING OFF THE TESTING SETTING ABOVE (namely, 'set -x' OR 'set -v'):
    set -

exit

## The guvcview parms above are:
## '-d /dev/video1' sets the device to the microscope, if /dev/video0 is
##                  already assigned to a webcam. The program defaults to /dev/video0.
## '-w 0' turns off hardware acceleration (necessary? maybe useful in video capture?)
## '-m 0' means no auto image captures, only manual (Number of Pictures to capture)
## '-t 0' means no auto video capture (Video capture time in seconds)
##
## '-f yuyv' sets the format ?for input from microscope?
##     I may experiment with other formats among the ones listed in guvcview help:
##             (mjpg|jpeg|yuyv|yvyu|uyvy|yyuv|yu12|yv12|gbrg|grbg|bggr|rggb)
##
## '-s 640x480' (or whatever) sets the resolution of the viewing window ---
##       The following resolutions (in the video opts of guvcview) work for my PC setup:
##           160x120, 176x144, 320x240, 352x288, 640x480 ---
##       but NOT: 800x600, 1280x960, 1280x1024, 1600x1200
##               [Viewport starts & stays black with format 'yuyv' set ---
##                with format 'mpg' there's lots of flashing, erratic behavior.
##                May need to try other formats.]
|
The bottom part of the script, after the 'exit' statement, is simply comment lines to help me remember what I did --- and what I might want to try in the future. You can paste this code into your own script file on your PC. Remember to make the script executable. For example: you can use the command chmod 755 guvc.sh at terminal window command prompt --- after positioning yourself in the directory in which you placed the script file. Alternatively, if you are using the Nautilus file manager, you can right-click on the 'guvc.sh' file, choose 'Properties', and use the 'Permissions' panel to make the file executable. Happy image capturing! |
|
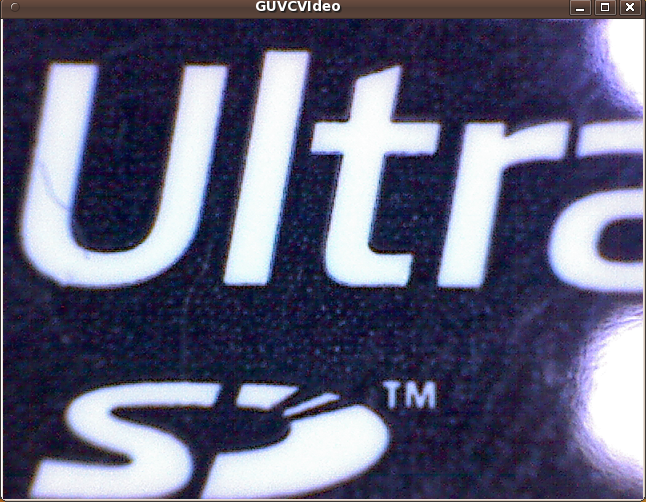
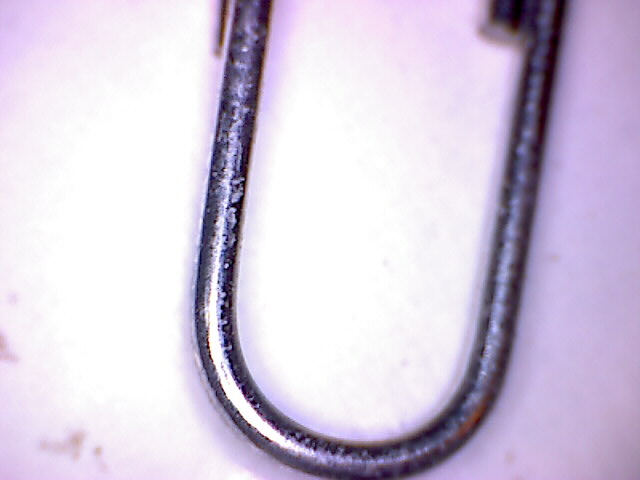
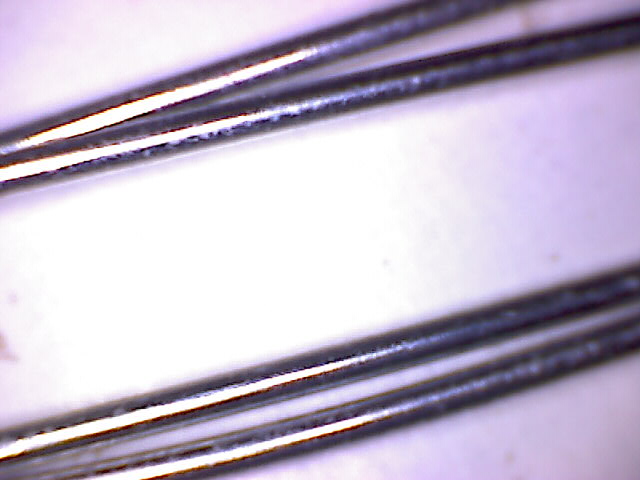
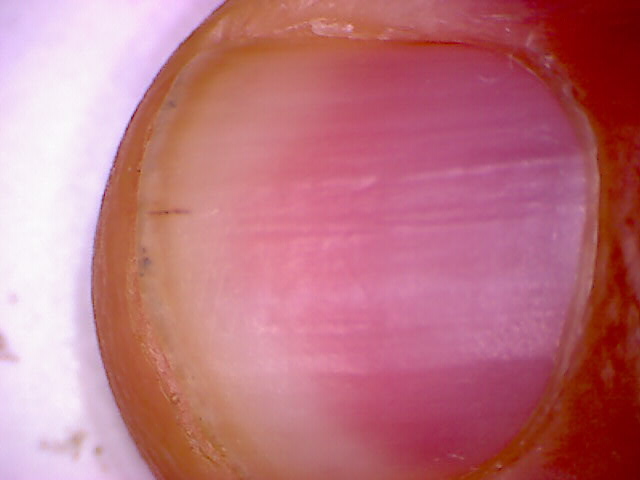
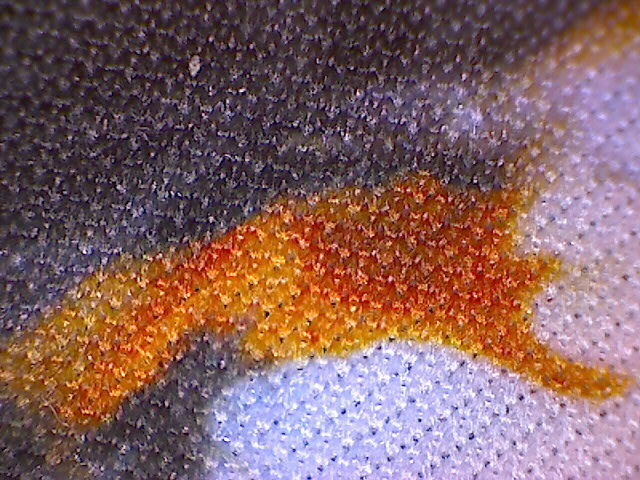
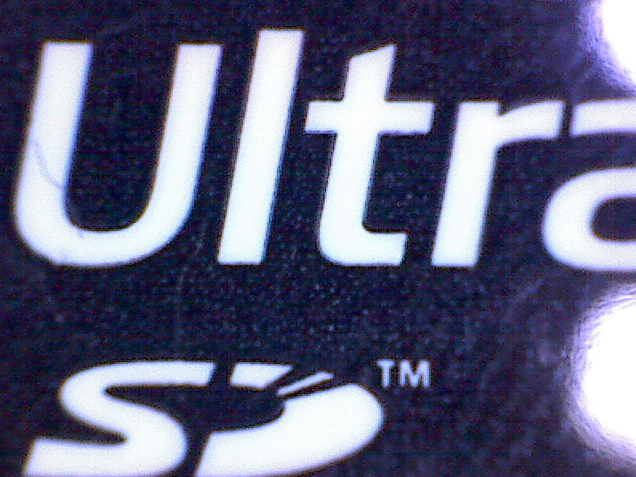
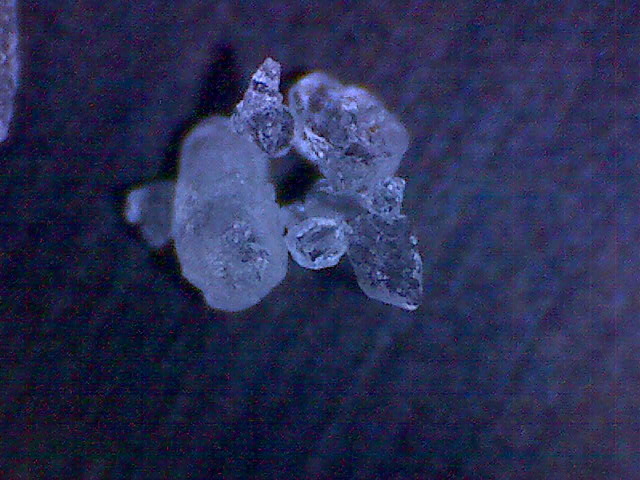
IMAGES :
Note that there is a 'depth of field' effect.
For contrast, the salt was put on a dark background |
|
Bottom of this
To return to a previously visited web page location, click on the
Back button of your web browser, a sufficient number of times.
OR, use the History-list option of your web browser.
< Go to Top of Page, above. >
Page was created 2010 Aug 07.
|