A 'How-To' for Scanning

Documents and Images

on Linux

with Epson Scanners

(with notes on Epson 'iscan' software
Installation & Usage on Ubuntu Linux)

(and notes on HP scanners
and 'xsane' software)

The Epson 'iscan' software interface.
Note the 'Preview' and 'Scan' buttons.

This interface image shows version 2.30.1.
The interface for later versions, like
2.30.4, looks the same.

Home > RefInfo menu >

Computer topics menu (Linux section) >

This Scanner How-To for Epson Scanners
(Installation and Use on Linux) page

! Note !
A few more notes and images may be added,
if/when I re-visit this page again.

Links to sections of this page below:

INTROduction       Initial Epson Scan Attempts


Install of 'iscan'       Sample Scans


Xsane Notes       HP scanners


More Scanning Info       Bottom of Page

INTRODUCTION :

In 2015, I was still using the Ubuntu 9.10 Linux operating system (the 2009 October release, 'Karmic Koala') --- with the Gnome 2 desktop environment --- on my main desktop computer.

I have needed to scan documents from time to time --- in order to be able to email the document images to various people (relatives, bank personnel, whatever).

Furthermore, I have needed to scan photos or other images (such as cartoons) from time to time --- in order to place the images on web pages (or whatever).

At one time (before 2014) I was using an HP PSC (Printer-Scanner-Copier) to do document and image scans.

Around 2014, I replaced the HP PSC with an Epson PSC.

This page is meant to describe how I was able to do document and image scanning with the Epson PSC (an Epson NX430 PSC) --- on Ubuntu Linux.

Spoiler alert:
It involved installing an Epson software package --- 'iscan' --- and I describe that install below --- followed by a description of using 'iscan' to scan documents and images.

An image of the 'iscan' GUI (Graphical User Interface) is at the top of this page.

Initial Epson Scan Attempts

In the 2012 time frame, I had used an HP (Hewlett-Packard) scanner connected (via a USB port) to my main desktop computer --- but around 2014 I replaced an HP PSC (Printer-Scanner-Copier) with an Epson PSC.

I used to use the Xsane software with the HP scanner. So, one day when I needed to scan a document with the Epson scanner, I tried starting up the Xsane software, but it would not recognize my Epson device, even though it was powered up and connected to a USB port on my computer.


    When the 'xsane' command starts up the Xsane software, the software scans the computer system for possible scanner devices. The Xsane software provides a list of the discovered devices in a small window, from which the user can select (via radiobuttons) which device to use. Then the main Xsane GUI comes up. (There is an image of the main Xsane GUI near the bottom of this page.)


Since I had replaced my HP scanner with an Epson NX430 scanner, the HP scanner was no longer detected --- but neither was the Epson scanner.

The only device being detected by Xsane was

    UVC camera (046d virtual device [v4l:/dev/video0]

which was my webcam.

So I began to try collecting information on how to get the Xsane software to recognize the Epson scanner. I did web searches on keywords like

I soon found that the 'sane' software (for which the 'Xsane' software is a GUI interface) uses some 'backend' configuration (.conf) files --- in the directory '/etc/sane.d'.

I did the 'ls' command on that directory and saw the following list of filenames.


abaton.conf          dll.conf      ma1509.conf      sharp.conf
agfafocus.conf       dll.d         matsushita.conf  sm3840.conf
apple.conf           dmc.conf      microtek.conf    snapscan.conf
artec.conf           epjitsu.conf  microtek2.conf   sp15c.conf
artec_eplus48u.conf  epson.conf    mustek.conf      st400.conf
avision.conf         epson2.conf   mustek_pp.conf   stv680.conf
bh.conf              fujitsu.conf  mustek_usb.conf  tamarack.conf
canon.conf           genesys.conf  nec.conf         teco1.conf
canon630u.conf       gphoto2.conf  net.conf         teco2.conf
canon_dr.conf        gt68xx.conf   pie.conf         teco3.conf
canon_pp.conf        hp.conf       pixma.conf       test.conf
cardscan.conf        hp3900.conf   plustek.conf     u12.conf
coolscan.conf        hp4200.conf   plustek_pp.conf  umax.conf
coolscan2.conf       hp5400.conf   qcam.conf        umax1220u.conf
coolscan3.conf       hpsj5s.conf   ricoh.conf       umax_pp.conf
dc210.conf           hs2p.conf     rts8891.conf     v4l.conf
dc240.conf           ibm.conf      s9036.conf       xerox_mfp.conf
dc25.conf            leo.conf      saned.conf
dell1600n_net.conf   lexmark.conf  sceptre.conf

I looked at the 'epson.conf' file and saw the following contents.


# epson.conf
#
# here are some examples for how to configure the EPSON backend
#
# SCSI scanner:
scsi EPSON
# for the GT-6500:
scsi "EPSON SC"
#
# Parallel port scanner:
#pio 0x278
#pio 0x378
#pio 0x3BC
#
# USB scanner:
# There are two different methods of configuring a USB scanner: libusb and the kernel module
# For any system with libusb support (which is pretty much any recent Linux distribution) the
# following line is sufficient. This however assumes that the connected scanner (or to be more
# accurate, it's device ID) is known to the backend. 
usb
# For libusb support for unknown scanners use the following command
# usb  
# e.g.:
# usb 0x4b8 0x110
# And for the scanner module, use the following configuration:
#usb /dev/usbscanner0
#usb /dev/usb/scanner0

I knew that my scanner was NOT connected via a SCSI interface --- but by a USB connection. But the 'usb' line in the epson config file was apparently not enough to 'discover' the Epson scanner.

To find what 'sane' software was available on my computer, I ran the command

    ls /usr/bin/*sane*

and saw the following two programs listed.

    /usr/bin/sane-find-scanner
    AND
    /usr/bin/xsane

The command 'sane-find-scanner' did not 'discover' any scanner devices --- but then I ran the command 'sudo sane-find-scanner' (i.e. I ran the command as 'root', the system administrator) and got the following output:


$ sudo sane-find-scanner
[sudo] password for <userid> : 

  # sane-find-scanner will now attempt to detect your scanner. If the
  # result is different from what you expected, first make sure your
  # scanner is powered up and properly connected to your computer.

  # No SCSI scanners found. If you expected something different, make sure that
  # you have loaded a kernel SCSI driver for your SCSI adapter.

found USB scanner (vendor=0x04b8, product=0x0884) at libusb:001:003
  # Your USB scanner was (probably) detected. It may or may not be supported by
  # SANE. Try scanimage -L and read the backend's manpage.

  # Not checking for parallel port scanners.

  # Most Scanners connected to the parallel port or other proprietary ports
  # can't be detected by this program.

Note the lines


found USB scanner (vendor=0x04b8, product=0x0884) at libusb:001:003

and


  # Your USB scanner was (probably) detected. It may or may not be supported by
  # SANE. Try scanimage -L ...

I tried changing 'epson.conf' to use lines:


usb 0x04b8 0x0884
usb /dev/usbscanner0
usb /dev/usb/scanner0

even though there did not appear to be '/dev/usbscanner0' and '/dev/usb/scanner0' device files on my computer.

BUT 'scanimage -L' only returned the video camera:


$ sudo scanimage -L
device `v4l:/dev/video0' is a Noname UVC Camera (046d:0807) virtual device

The 'epson2.conf' file was essentially the same as the 'epson.conf' file. It was looking like I would need some Epson-specific help at this point.

Install of Epson 'iscan' software :

At this point, I started doing web searches using keywords like

--- in other words, I dropped the keyword 'xsane'.

I found some references to 'iscan' (Image Scan) software for Epson scanners and ended up finding the best info for Epson scanner software by using keywords like

I eventually found some Epson web pages on driver software, such as an Epson Downloads Search page on which I asked for results for Product Name 'nx430' and Operation System 'Linux'.

I found an Epson FAQ page that indicated the 'iscan' software could be downloaded as either '.deb' files or '.rpm' files. For my Ubuntu Linux computer, '.deb' files were appropriate.

    Since I was using a 32-bit version of Ubuntu Linux (Ubuntu 9.10), it was appropriate to use the 'i386' files, rather than the 'amd64' files.

I downloaded the 2 '.deb' files

    iscan-data_1.34.0-1_all.deb
    AND
    iscan_2.30.1-1~usb0.1.ltdl7_i386.deb

I also downloaded a 'userg_e' (user guide, English) PDF file that I named
'Epson-ImageScan_UserGuide_2012_47pgs.pdf'.


    It can be rather frustrating navigating through the Epson download pages. (Sometimes the Search field does not seem to work, and sometimes it looks like you might need to provide an email address in order to access certain pages. Not so.)

    So for alternative ways of navigating the Epson download pages, here are some Epson pages that may be accessible (if they have not gone dead).

    An Epson Download Center page (at 'download.ebz.epson.net') on which you could enter a 'Product Name' and choose an 'Operation System'.

    An 'Epson Official Support' page (at 'epson.com'), with a Search field for Epson product name.


The Epson instructions indicated that an 'iscan-network' '.deb' file may also need to be installed, so I downloaded the '.deb' file

    iscan-network-nt_1.1.1-1_i386.deb

from a DriverDownload page (at 'download.ebz.epson.net').
(I clicked the 'Accept' button at the bottom of the page.)

The Epson instructions said to install the 'iscan-data' package before the 'iscan' package, so I installed the 'iscan-data' and 'iscan' deb packages in that order.

    For each install file, I right-clicked on the '.deb' file in my downloads directory and chose 'Open with GDebi Package Installer'. (I was using the Nautilus file manager of the Gnome 2 desktop environment.)

After I got the 'package installed' messages in the GDebi 
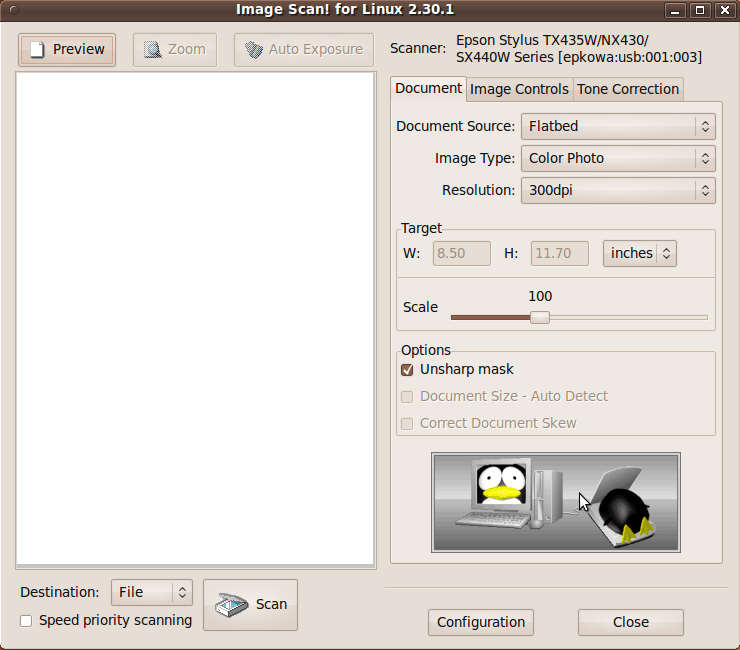
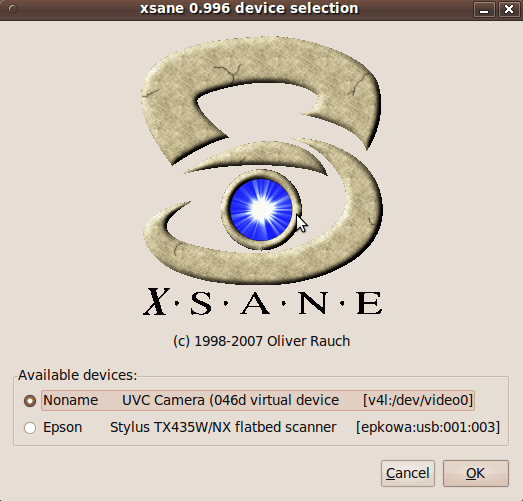
GUI window, I typed 'iscan' in a terminal window. After a few seconds, I got a popup that said


   Could not send command to scanner.
   Check the scanner's status.

I thought that the message may indicate that the 'iscan-network' package needed to be installed, so I installed the 'iscan-network' deb package.

But the 'iscan' command still gave the same popup message after installing 'iscan-network'. (Apparently I did not need to install the 'iscan-network' package.)

Although I have definite concerns about running the 'iscan' software as 'root', I tried the command 'sudo iscan' and IT WORKED.

The following 'iscan' GUI appeared.

Sample Scans:

I put a few cartoons on the Epson NX430 scanner surface and clicked on the 'Preview' button at the top of the GUI. The following scan image appeared.

To do a 'high-definition' scan (to a file), I clicked on the 'Scan' button at the bottom of the GUI.

The following 'file-save' GUI appeared --- in which I selected a save directory and filename.

A PNG file type was available, and I used that.

After I clicked the 'OK' button, the following scanning-in-progress window appeared, to let the user know the 'percent-done' of the scan.

To demonstrate the quality of the image in the PNG file, an image of one of the cartoons that were scanned at 300dpi is shown below.

Note that the grainy detail is visible --- in the colored backgrounds in the cartoon panels.

    Since the typical computer monitor circa 2015 shows images at about 75dpi, this cartoon image will appear at much larger than actual size, on such a monitor --- when shown at 'one pixel per scanned-dot'.

Note that the quality of the capture is quite good when using the default '300 dpi' scanning resolution.


The Simplicity :

Note that the scan was almost as simple as pressing only two buttons --- 'Preview' and 'Scan'.

In many cases, you may be dealing with text documents for which you do not need color. In that case, you may wish to change the 'Image Type' option. Here are the choices.

  • Color Photo
  • Color Document
  • Black & White Photo
  • Black & White Document
  • Line Art

If you save the scan as a PNG file, you may wish to perform various post-processing options, such as

  • edit the image file with an image editor, such as 'mtpaint' --- for example, to crop the image and perhaps do some 'gamma correction' (brighten the image)

  • compress the PNG file with a program such as 'pngcrush'

  • convert the PNG file to a still smaller file, such as GIF (max 256 colors) or lossy-compressed JPEG --- say, with the ImageMagick 'convert' command.

That may be all you need to know for doing scans. But ...

For more information on using the more advanced options of the Epson 'iscan' software, you can browse (or download) this Epson Image Scan (iscan) User Guide (2012, 47 pages).

    By the way, I found that in later login sessions, I could start up the 'iscan' software with the simple command 'iscan', rather than 'sudo iscan'.

Notes on Xsane scanner software :

After doing the install of Epson's 'iscan', I found that 'Xsane' would now discover the Epson device, BUT it would not connect to it.

When the 'xsane' software is started, it scans for devices and shows what it discovered in a 'device selection' popup window, as in the following image.

When I selected 'Epson' (from the Xsane window above, that showed 'video0' and 'Epson' devices), Xsane gave a popup error message:


   Failed to open device 'epkowa:usb:001:003'
   Access to resource has been denied.

I later found that, after installing the Epson 'iscan' software, the 'scanimage -L' command also discovered the Epson printer-scanner:


$ scanimage -L
device `v4l:/dev/video0' is a Noname UVC Camera (046d:0807) virtual device
device `epkowa:usb:001:003' is a Epson (unknown model) flatbed scanner

It may be that the installation of the 'iscan' software did some configuring of the Epson USB scanner by means of 'libusb' --- as mentioned in the 'epson.conf' file above.


I guessed that I may need to run 'sudo xsane' to avoid the 'Failed to open device' message.

When I used 'sudo xsane', I found that 'xsane' gives the following popup that says you run XSane as root at your own risk.

After selecting the Epson scanner in the Xsane startup window --- and after clicking on the 'Continue at your own risk' button, the initial Xsane GUI showed up, as follows.

The 'File > Info' option results in the following popup Info window.

It was not intuitively obvious to me how to do a 'Preview' scan and a 'Save-to-file' scan with Xsane.

There is only one 'Scan' button on the Xsane GUI, whereas there are 'Preview' and 'Scan' buttons on the 'iscan' GUI.

I did some reading of the Xsane documentation at xsane.org.

One thing that concerned me was that the bottom of the Xsane GUI (above) showed '3.99 in x 10.88 in'. It seemed to me that that label should show something like '8.5 in x 10.88 in' by default --- but there is not an obvious way to change those dimensions.

The xsane.org documentation indicated that there is an Xsane 'Advanced Options' window in which those dimensions could be set.

I finally found that you can use the 'Window' option, at the top of the Xsane GUI, to show the 'Advanced Options' window. In that window I set the 'Scan area' to 'Letter'. The bottom of the Xsane GUI then showed '8.50 in x 11.00 in'.

I then found that you can do either a 'Preview' scan or a 'Save-to-file' scan by using the single 'Scan' button at the bottom of the Xsane GUI.

You simply need to choose 'Viewer' or 'Save' in the button at the top-right of the Xsane GUI.

As you can see in the Xsane GUI image above, that options button is defaulted to 'Viewer' when the GUI first comes up.

So now it looks like I can use either 'iscan' or 'Xsane' to do scans with the Epson NX430 scanner.


Some miscellaneous observations :
(on 'sane', 'xsane', and root-owned files)

I found that the 'sane' and 'xsane' software creates a '.sane/xsane' directory (a '.sane' directory with the 'xsane' subdirectory) in the user's home directory.

When I used the 'ls -l' command, it showed the following files --- each several kilobytes in size.


Epson:StylusTX435W_NX430_SX440WSeries.drc
Hewlett-Packard:psc__1300__series.drc
Noname:UVCCamera(046d:0807).drc
xsane.mdf
xsane.rc

The 'Epson:Stylus...' file had been created as a root-owned file. The others were owned by my userid.

I used the 'sudo chown userid.userid' command to change the ownership of the 'Epson:Stylus...' file --- in hopes that I could successfully run 'xsane' rather than 'sudo xsane'.

I do not know for sure whether this solved the sudo/root problem (with 'xsane' --- and with 'iscan') --- BUT I found that in later login sessions, I could use the Xsane software with the 'xsane' command --- rather than 'sudo xsane'.

Some HP scanning notes:

I did a search for other 'scan' commands:


$ ls /usr/bin/*scan*
/usr/bin/amarokcollectionscanner  /usr/bin/iscan
/usr/bin/dpkg-scanpackages        /usr/bin/oggz-scan
/usr/bin/dpkg-scansources         /usr/bin/sane-find-scanner
/usr/bin/g-ir-scanner             /usr/bin/scanimage
/usr/bin/gamma4scanimage          /usr/bin/ssh-keyscan
/usr/bin/hp-scan

Note, in particular, 'hp-scan', 'iscan', and 'scanimage'.

    The command 'man scanimage' gives a lot of info on that command. In particular: "scanimage is a command-line interface to control image acquisition devices such as flatbed scanners or cameras." We used the 'scanimage -L' command above, to 'discover' the scanning devices.

    After quite a bit of reading, I realized that 'scanimage' performs the same function as 'xsane' --- but 'scanimage' is a command-line program while 'xsane' is a GUI program.

I tried 'hp-scan'. It gave the following output.


$ hp-scan

HP Linux Imaging and Printing System (ver. 3.9.8)
Scan Utility ver. 2.2

Copyright (c) 2001-9 Hewlett-Packard Development Company, LP
This software comes with ABSOLUTELY NO WARRANTY.
This is free software, and you are welcome to distribute it
under certain conditions. See COPYING file for more details.


-----------------
| SELECT DEVICE |
-----------------

  Num       Scan device URI                               
  --------  ----------------------------------------------
  0         hpaio:/usb/PSC_1600_series?serial=MY585F32GZL0
  1         hpaio:/usb/psc_1300_series?serial=MY431DC0XB9F

Enter number 0...1 for device (q=quit) ?1
warning: No destinations specified. Adding 'file' destination by default.
warning: File destination enabled with no output file specified.
Setting output format to JPEG for color/lineart mode.
warning: Defaulting to '/home/userid/hpscan001.jpg'.
error: Unable to locate device hpaio:/usb/psc_1300_series?serial=MY431DC0XB9F
   using SANE backend hpaio:. Please check HPLIP installation.

The 'hp-scan' command showed two HP PSC devices that were no longer connected to my computer.

The note 'HP Linux Imaging and Printing System' (Wikipedia link) at the top of the output reminded me that at some point in the past, I had installed the 'hplip' system. That system, in combination with the 'Xsane' software, probably allowed me to use my HP scanner models when they were connected to this computer.

So this is a note to those with HP scanners: You will probably be able to do scans with your HP PSC device, by using the 'Xsane' software in conjunction with the 'hplip' software. Both of those packages may be available via the package manager of your Linux 'distro' (distribution).


    By the way, I have NOT tried to do a scan (with 'iscan' or Xsane') using a video device --- like the webcam indicated by 'v4l:/dev/video0' and 'UVC Camera (046d:0807) virtual device' above. But I may try that someday. I may report results here.


Concluding Remarks:

If you want to research details about image scanning, especially on Linux, more thoroughly, you may wish to try the following commands:


   man scanimage
   man sane
   man sane-find-scanner
   man sane-epson
   man sane-epson2
   man sane-epkowa
   man sane-usb
   man hp-scan
   man iscan
   man xsane

More extensive information on SANE (Scanner Access Now Easy) is available at the sane-project.org web site.

In particular, see the SANE 'Documentation' page.

After some reading of this documentation, you find that SANE is actually a 'middle-man' (some middle-code) --- between a 'frontend' (a command-line or GUI interface) and a 'backend' (a 'driver').

The following paragraph from the SANE Intro page gives a good explanation of SANE's 'raison-de-etre' (reason for being).

    "If you're familiar with TWAIN, you may wonder why there is a need for SANE.

    Simply put, TWAIN does not separate the user-interface from the driver of a device. This, unfortunately, makes it difficult, if not impossible, to provide network transparent access to image acquisition devices (which is useful if you have a LAN full of machines, but scanners connected to only one or two machines; it's obviously also useful for remote-controlled cameras and such).

    It also means that any particular TWAIN driver is pretty much married to a particular GUI API (be it Win32 or the Mac API).

    In contrast, SANE cleanly separates device controls from their representation in a user-interface.

    As a result, SANE has no difficulty supporting command-line driven interfaces or network-transparent scanning. For these reasons, it is unlikely that there will ever be a SANE backend that can talk to a TWAIN driver.

    The converse is no problem though: it is pretty straight forward to access SANE devices through a TWAIN source. In summary, if TWAIN had been just a little better designed, there would have been no reason for SANE to exist, but things being the way they are, TWAIN simply isn't SANE."

Happy scanning!

FOR MORE SCANNING INFORMATION:
(on Linux, with an Epson scanner)

To find more information on using a scanner on Linux (especially using an Epson scanner for scanning documents, on Ubuntu versions of Linux), you can try WEB SEARCHES on keywords such as the following.

You can also try Wikipedia pages like the following, and following links on those pages for even more information.

Some Epson pages that have to do with their scanners and software for document scanning include the following pages.

    Linux Scanner Driver Download
    (for Epson 'Image Scan' v3, for various Linux versions)
    (at 'support.epson.net')
    ('imagescan' is an alternative to 'iscan'??)

AND there are/were pages on document scanning on Linux systems:

Bottom of this page
A 'How-To' for Document/Image Scanning
for Epson scanners attached to a Linux computer

(including notes on 'iscan' software
installation and usage on Linux).

To return to a previously visited web page location, click on the Back button of your web browser a sufficient number of times.

OR, use the History-list option of your web browser.

OR ...

< Go to Top of Page, above. >

Page history:

Page was created 2015 Feb 02.

Page was changed 2015 Feb 23.

Page was changed 2018 Dec 18.
(Added css and javascript to try to handle text-size for smartphones, esp. in portrait orientation.)

Page was changed 2021 Nov 15.
(Added some links at top of page to allow the user to jump to the indicated sections of the page.
Also added some code at images so that they are sized according to the width of the web browser window.
Also did some minor reformatting and rewording on the page.)