Download Page of
scalable FONT files
'fun' fonts
'GROUP-1'
(a self-installing download file for Linux)
|
|
Download Page of
|
|
! Note !
A few notes here may be touched up or revised,
if/when I re-visit or use this page.
< Go to Fonts Download Link and Instructions,
below. >
(i.e. Skip the Intro)
|
INTRODUCTION : In 2009, I finally 'took the plunge' and migrated my mail, bookmarks, etc. from a (main) Microsoft Windows machine to a (main) Linux machine. I have documented reasons why I went to Linux, along with install notes, on an Ubuntu Install notes page I found that many of the fonts available with the operating system were either rather boring or of poor quality. So I searched on the internet for some 'fun', good-quality fonts to use as replacements --- in particular for the Tcl-Tk GUI's of my Freedom Environment subsystems. New font facilities ( 'Xft' and 'font-config' ) became available for Linux around the year 2000. These facilities provided rendering of fonts that included anti-aliasing. This vastly improved the appearance of most fonts on Linux. With those new Linux font systems, you can simply copy '.ttf' files (scalable True Type font files) into the '.fonts' subdirectory of your home directory --- to make the fonts available to most of your applications --- that is, the applications that recognize and use the 'font-config' and 'Xft' systems. You MAY need to issue the 'fc-cache' command after putting new '.ttf' files in your '.fonts' directory. Then applications like GIMP, OpenOffice, your web browser, and many more will be able to use your new fonts. The install file : This is a download page for a set of 'fun' scalable font files. These fonts are, for the most part, fonts that provide a change from the rather 'stuffy' serif and sans-serif 'base' fonts that are typically available with most Linux 'distros' and their included applications, circa 2009 to 2012. The fonts download file (a self-extracting script file for Linux and other Unix-like operating systems) --- along with detailed install instructions --- are below. There are more than 100 fonts in the download file. I go to this web page to install the fonts when I need them on one of my [new or upgraded] desktop or laptop or netbook computers. But I make these install files available to other Linux users --- in the spirit of the open, giving-back-to-the-community nature of the Linux culture. Some sources of fonts : There are many web sites that offer free fonts. For example, there are many sites that offer more than 1,000 'public domain' fonts for download. You can find many such sites by doing a Google search on keywords such as font download ttf. Many of the fonts in this 'group-1' package of fonts were selected from such sites. |
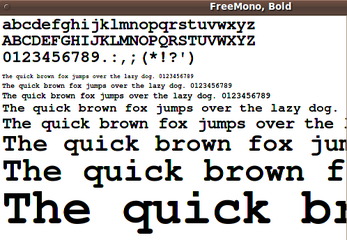
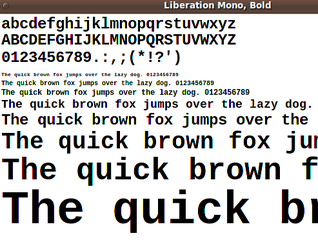
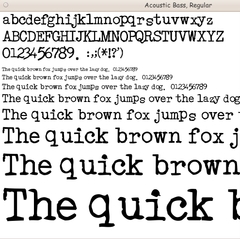
The 'fixed-width' (a.k.a. 'monospace') fonts are recognizable in
these 'gnome-font-viewer' screen captures because the line of
lower-case letters is the exact same length as the upper-case
letters --- and the right-parenthesis is always below the letter 'T'.
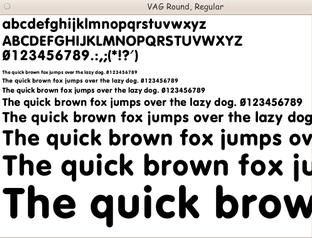
Compare these images with the images of 'variable-width'
(a.k.a. 'proportional') fonts at the top of this page.
|
Scalable Fonts DOWNLOAD LINK and Instructions : The install file is a self-extracting shell script. It would be nice if we could simply name it with a '.sh' suffix. But it appears that most web browsers (or, actually, web servers) will assume that it is an all-text file, when, in fact, it has a gzipped tar file appended to the self-extracting script portion. When the web browser downloads the file, if the file has the '.sh' suffix, the web-browser/web-server combo will download it in 'ascii' mode instead of 'binary' mode. The binary data in the file (the gzipped tar stuff) gets corrupted. As a workaround we provide the '.sh' file with a suffix of '.sh.exe' --- in hopes that your web browser will think the file is a 'binary' file and download it in a 'binary' mode that does not corrupt the file. The '.sh.exe' file downloaded fine for me, using the Seamonkey2 web browser on Ubuntu Linux --- on a little Acer netbook.
Right click here, on the '.sh.exe' file, and, in the popup menu of your web browser, choose to save this self-extracting shell script in a directory on your machine. (Your web browser will offer an option such as 'Save Link Target As ...'.)
For good measure (an alternative), we also provide the file with the suffix '.sh.tar'. So if the '.sh.exe' file does not work for you (say, the web-server/web-browser 'dance' tries to do something 'funny' with files with a '.exe' suffix), right click here, on the '.sh.tar' file, and, in the popup menu of your web browser, choose to save this self-extracting shell script in a download directory on your machine.
NOTE: Most of these fonts are available to the public for free. For example, in many of these font files are guidelines like: However, if an author, of one or more of these fonts, objects to having the font(s) included in this package of fonts, I will be glad to remove the font file(s) from this self-extracting-install-script package of fonts. The install steps, in detail : Your home directory or the 'Desktop' directory of your home directory will do, as the download directory. BUT ... To keep an organized directory structure, you may find it better to make a directory named 'DOWNLOADS', for example, in your Home directory. Then save ALL your 'third party' application install files there, from then on. By 'third party', I mean applications that are not distributed via a monolithic package management system of your Linux/Unix system. In 2010, the OpenShot video editor for Linux was such an application. That app is/was not available via the 'Ubuntu Software Center' or the 'Synaptic Package Manager' systems in Ubuntu Linux. I downloaded the OpenShot install files from the OpenShot video web site into my '$HOME/DOWNLOADS' directory. Seamonkey2 is another example of such an app. In mid-2010, it was not available in the 'Ubuntu Software Center' nor in the 'Synaptic Package Manager'. I downloaded its Linux install file from the Seamonkey website into my $HOME/DOWNLOADS directory --- and I installed it into a $HOME/apps directory that I created for apps that I want to preserve during Linux upgrades, simply by preserving [not overlaying] my home directory. To see the quick version of installing these 'fun-fonts', go to the brief SUMMARY section at the bottom of this web page. A detailed description of the install steps is in the following paragraphs. Preparing the downloaded '.sh' install file for execution : First, rename the file --- remove the '.exe' or '.tar' suffix. If you are positioned at your download directory with Nautilus, simply right click on the install file, choose 'Rename' in the popup menu, and use the Backspace key to remove the last 4 characters from the filename. If you are in a terminal window, positioned at the download directory, you can use the 'mv' (rename) Linux/Unix command in a form like this : mv [whatever].sh.exe [whatever].sh
NOTE:
Altnernatively, in a terminal window, when you are positioned in the directory in which you put the '.sh' install file, issue the 'chmod 755' command on the filename of the self-extracting script. The format : chmod 755 [whatever].sh Content of the '.sh' file : While you are in that terminal window, you can check out the script lines of the self-extracting-script file by issuing the 'head -140' command against the file. You will see about 135 lines of script text (lots of comment lines) --- and then some gobbledy-gook characters in the terminal window. That gobbledy-gook is the starting contents of the gzipped tar file that contains the 'fun-fonts' '.ttf' files. The self-extracting script is a combination of text lines and binary data. If you try to view the install script with a text editor, like 'gedit', it will not view the file, because the editor detects the binary data and thinks it is dealing with a binary file. The authors of 'gedit' do not allow you to try to display the file --- partly because 'lines' in (some) binary data files are thousands of bytes long. As an interesting note (at least I think so), the FE (= Freedom Environment) 'xpg' text-file viewer utility is not as finicky as 'gedit'. 'xpg' WILL show the binary file. Of course, most of the bytes in the file show as gobbledy-gook characters in the 'xpg' text area. But you CAN read strings of human-readable text in the binary file. In particular, I tried 'xpg' on the 'Group-1' fonts self-extracting script file available via the link above. 'xpg' brought that combined text-and-binary file up quickly with no complaints (error messages). I could see the text of the script at the top of the file. How to execute the '.sh' install script : If you are still in a terminal after doing the 'head' command on the '.sh' file, you could execute it right there via the command line. (See a mouse-click method, below.) Enter a command of the form ./[script-mid-name].sh That is, type a dot and slash, then type (or paste) the filename and press Enter. You will see some output from the execution of the script, including
An alternative to running the install script by If you are positioned at the '.sh' install script with Nautilus (in your download directory), you could double-click on it --- after making sure that it has execute permission, as described above --- and choose the option to 'Run in a terminal'. You will see the messages described above appearing in the terminal that pops up. If the terminal window just flashes and does not stay open (or the installation goes so fast that the terminal window does not even flash), navigate to the '$HOME/.fonts' directory, and see if the 'fun' fonts have been added --- font files like 'acme_explosive.ttf' and 'augie.ttf' and 'zachary.ttf'. A safer-than-most install strategy : Note that you do not have to change to 'root' to do the install. In fact, I never like having to switch to 'root' to do an install. When I have to supply the root password to do an install, I am being put in the position of having to trust the people who put the install package together that they are not going to use that all powerful permission to do serious damage to the root-owned directories and files on my machine --- or install key-loggers or Linux/Unix viruses/trojan-horses on my machine, hidden in that massive directory structure. Or, 'they' could install a 'hidden' program that sends data to an organization (or person), over the Internet, or do some other useless-to-me thing, whenever their program is 'triggered', hidden among all those directories (and when I have my connection to the Internet on). Do you hear that HP, Microsoft, Google, and a large number of software vendors? Cut that nonsense out! At least prompt us, before taking liberties with our computers. For example, let us decide whether we want your programs to start up as part of our computer's boot up process. Maybe we don't want your 'stuff' shoved in our faces every time we log on --- or every time we start up an app in which your (never-going-to-be-used-by-me) stuff has been included as an intrusive plugin. (Hear that, Mozilla Firefox and Google??) So rest easy. This install does not require you to open yourself to damage like mangling of your root-owned directories or commandeering of root-owned processes. And nothing is added to your computer's startup processes. YOU are the one who decides when these scalable font files are used. For some simplicity, this install does not ask for an install directory. It simply uses the '.fonts' directory of your home directory --- which already exists in most Linux operating systems. Having fonts like this in your home directory can be a real boon at Linux OS upgrade time. If you follow the procedure of preserving your home directory during a Linux OS upgrade, then you do not have to re-install these scalable font files, after your Linux upgrade. Since these installation files are not in a system directory like '/usr', they will not be wiped out in a Linux system upgrade. And even if you allow the Linux OS upgrade to wipe out your home directory, if you simply drag your '.fonts' directory onto a USB stick (or some other storage device) before the Linux upgrade, you can simply drag it back to your home directory after the Linux upgrade is complete. Size of the installation : After installation, these 'Group-1' font files occupy on the order of 30 Megabytes of additional space in your '$HOME/.fonts' directory. And the self-extracting install script is about 10 Megabytes in size, in your 'DOWNLOADS' directory. Names of the font files : After installation, you will see that the names of these '.ttf' font files are in all lower-case letters and there are no embedded spaces in the names. In addition to these filename changes to the original files, I also removed punctuation like apostrophes, parentheses, exclamation points, or additional periods. In some cases, I replaced the punctuation with a hypen (minus sign). I replaced embedded spaces with underscores. I did this because I (and others) have encountered some problems, in some versions of the 'fontconfig' and/or 'Xft' systems, with font files whose names contain embedded spaces, and, in some cases, with font files whose names include upper-case letters or punctuation. |
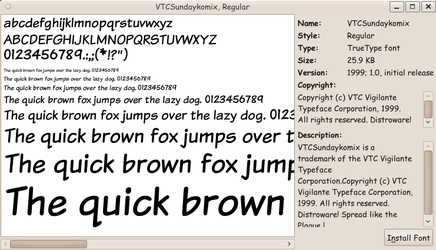
Some fonts will render your lower-case and upper-case text
with the same letter images --- as seen in the two examples above,
where lower-case letters are the same as upper-case letters.
Such fonts have limited use, but they may be useful in some graphics
applications --- even if they may not be useful in most programming
and text-presentation applications.
|
SUMMARY of the install steps : The detailed install description above may sound like a lot, but it is only a few steps after downloading the self-extracting install file to your computer :
and all three of these steps can be done in Nautilus or some other capable file manager. That is, the install can be done with mostly mouse clicks --- rather than using the command line. (The only keyboard use might be the Backspace or Delete key to remove the suffix.) When you double-click on the '.sh' file, there is no need for a progress bar. The install occurs within a few seconds. You may need to do the 'fc-cache' command, to make the fonts available to your applications. (You should be able to simply open a shell window positioned at your home directory and do the command under your own userid. Reportedly, you do not have to issue the 'fc-cache' command as 'root'.) You can do a Google search on the terms 'Xft', 'fontconfig', and 'fc-cache' --- to find more information on those terms. The 'fontconfig' system is used to manage the fonts and the 'Xft' system is used to render the fonts, with anti-aliasing used to smooth the fonts. Browsing your fonts : You can see a nice, scrollable display of sample text from each of your installed fonts by using the 'gnome-specimen' GUI --- or a Qt/KDE utility of the same kind, like 'fontmatrix'. These utilities appear to use the 'Xft' font rendering system, so you should see nice, anti-aliased renderings of the fonts. More fonts : If it turns out that these 100-plus fonts do not satisfy your appetite for variety in fonts, there are 'group-2' and 'group-3' download pages of MORE 'fun' fonts. Like this page, those pages provide a self-extracting script that will install another 200-or-so fonts, each, in your '.fonts' directory. |
|
Bottom of this
To return to a previously visited web page location, click on the
Back button of your web browser a sufficient number of times.
OR, use the History-list option of your web browser.
< Go to Top of Page, above. >
|
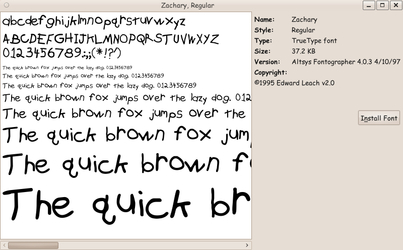
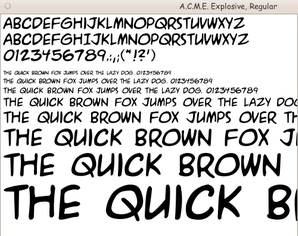
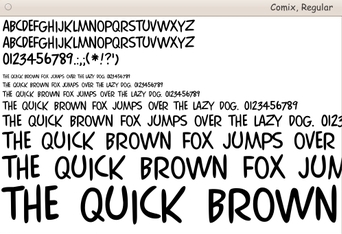
The images on this page were captured from display of
the '.ttf' font files with 'gnome-font-viewer'.
The screen captures were done with
'gnome-screenshot'.
Cropping of the images was done with
'mtpaint'.
Down-sizing the images was done with 'mtpaint' or with
an
ImageMagick 'convert' script in the
Freedom Environment
subsystem that is called
'feNautilusScripts'.