2008 Oct 20 blog post by Mark Tyler on
Colour Protection Mask
(link to original post)
Keywords:
Colour Protection, Gradient, Mask, Palette, Settings Toolbar
Some of the images below have a larger version.
Click on the image to see the larger version.
Click on your web browser's Back button to return to this page.
The following are Mark Tyler's words:
When I first created mtPaint in 2004, one of the most important features I wanted was a colour protection mask (as described in section 3.3.4 of the mtPaint handbook).
This feature allows the artist to protect certain areas of the canvas according to their colour so that they don't get painted over.
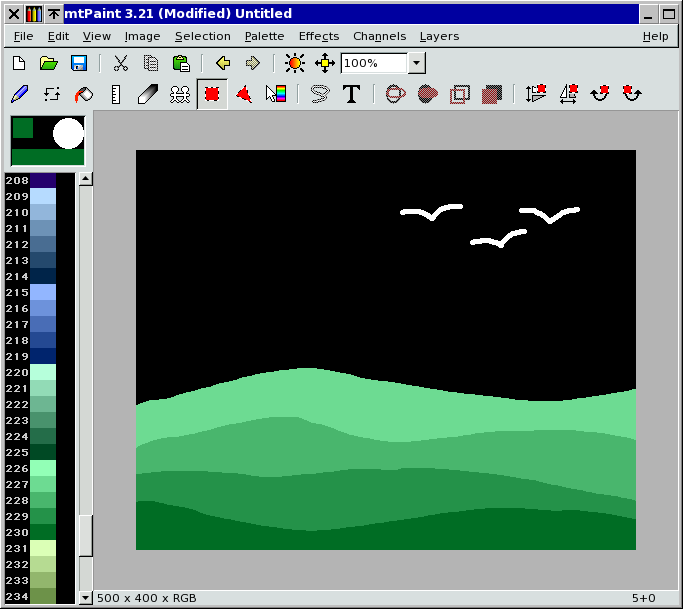
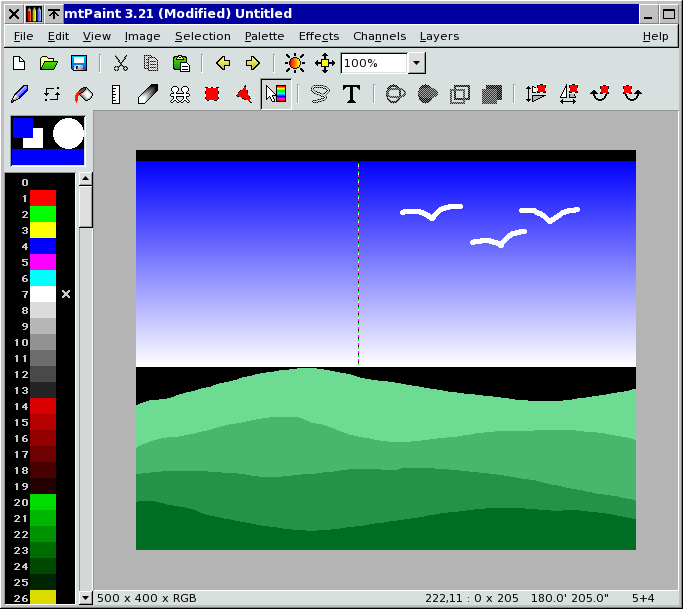
To demonstrate the value of this feature, here is a simple example. Firstly I create a new RGB image in mtPaint with a size of 500x400 pixels. I then create a hill effect using a round brush with colours 227-230 from the default palette, and then a few birdlike creatures in the sky, as per this screenshot:
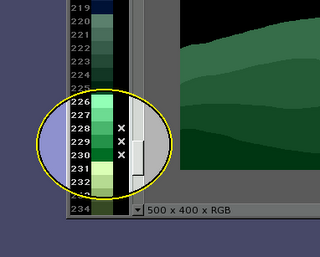
At this point you can quickly test the protection mask by clicking on the area to the right of colours 228-230 in the palette, which should bring up the crosses to show that these colours are now protected:
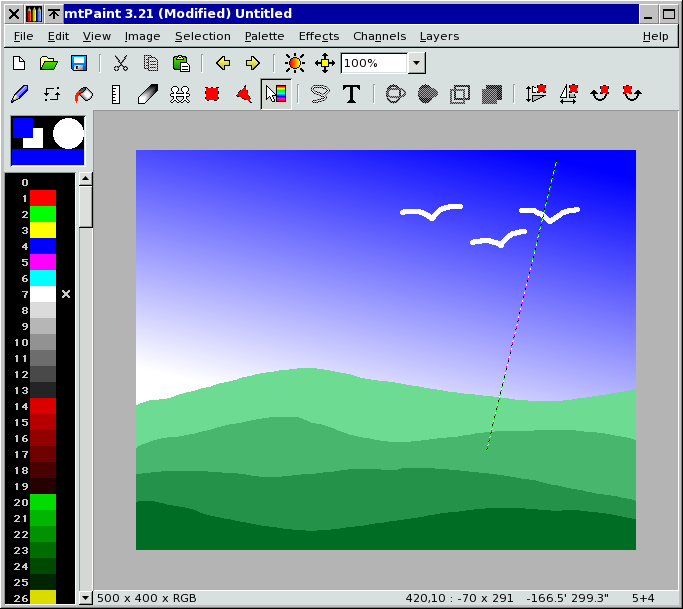
To test this protection we can scribble a new colour across the canvas:
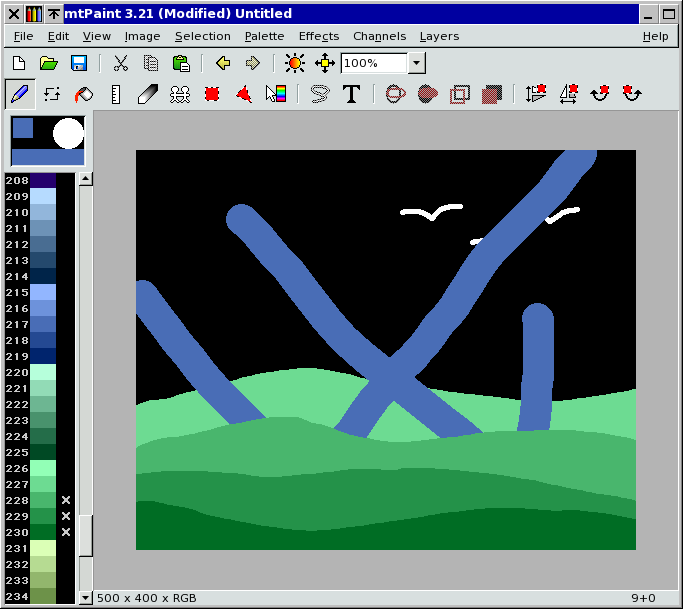
As we can see the 3 colours in the hills have been protected. However the black background, the white birds the the rearmost green shade have not been protected. Before we colour the sky, we must therefore also protect colours 227 and 7 in the palette.
The simplest way to create a sky in mtPaint is to use the gradient tool. Firstly you select the 2 colours you wish to use at either end of the gradient so left click on colour 4 (blue) and right click on colour 7 (white). Now you must place the gradient start and end points so choose the gradient placement tool from the toolbar. Lastly you left click near the top of the canvas and then left click further down which should result in this:
Notice how this preview still respects the colour protection mask as the birds have not been hidden in the same way as the unprotected black canvas. The next stage is to configure the gradient so that there are no black bands above and below the start/end points. To do this right click on the gradient placement icon on the toolbar which should bring this dialog up:

You should then change "Extension type" to "Level" which extends the colours beyond the end points. If you click OK you should then see this new gradient in action. At this point the gradient has not been committed to the canvas so you can move the endpoints to suit your artistic whim. To do this simply click near an endpoint, move the mouse to the new point and then click again to fix the new position:
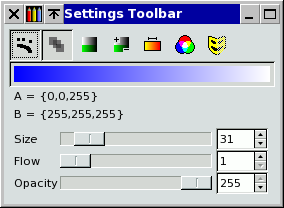
At this point I am now happy with the results so I want to commit this to the canvas. Firstly I must switch the painting mode to use the gradient, so I press F7 on the keyboard to bring up the settings toolbar:
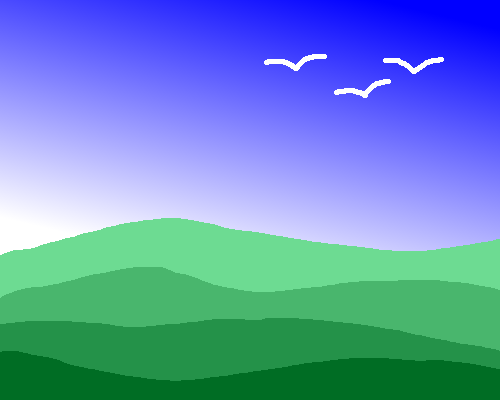
I must then click the gradient bar so that gradient mode is switched on. The easiest way to paint this gradient over the whole of the canvas is to paint a rectangle over the whole picture. To do this press Ctrl+A, and then click the "Fill Selection" icon on the toolbar which should then commit the gradient paint to the canvas. If you intend doing any more painting with other tools, remember to turn the gradient mode off so you can paint as normal. Here is the final picture: